
Install WordPress on Ubuntu 18.04
How to install WordPress on Ubuntu with Apache2 and PHP7.0
This guide will help you install WordPress on Ubuntu. This will help you leverage cost effective technology that requires no licensing. There are many other CMS systems out there, and few are very good. WordPress is tops due to the fact that it has more support and thousands of plugins and themes. It’s SEO benefits are substantial and it’s building blocks allow even the uninitiated a chance to develop great websites. I have personally adjusted and run through these steps myself so can confirm it is a working set of steps!
WordPress is the most powerful and popular content management system and is the right tool to develop and build powerful and dynamic websites. With PHP 7.0 now supported, you can greatly improve on its performance when configured with Apache2. For those who want to learn how to install WordPress on Ubuntu, the steps below should help greatly.

To get started with installing WordPress, follow the steps below:
1: Install Apache2 HTTP Server
WordPress needs a web server and Apache2 is lightweight, powerful and a highly configurable Web Server. To install it on Ubuntu and configure it to start automatically on boot, run the commands below:
sudo apt update
sudo apt install apache2
sudo systemctl stop apache2.service
sudo systemctl start apache2.service
sudo systemctl enable apache2.service
2: Install SQL Database Server
sudo apt-get install mysql-server
sudo ufw allow mysql
sudo systemctl enable mysql
Now connect to MYSQL and create database, replace username and database name as you see fit
sudo mysql_secure_installation
- Enter current password for root (enter for none): Just press the Enter
- Set root password? [Y/n]: Y
- New password: Enter password
- Re-enter new password: Repeat password
- Remove anonymous users? [Y/n]: Y
- Disallow root login remotely? [Y/n]: Y
- Remove test database and access to it? [Y/n]: Y
- Reload privilege tables now? [Y/n]: Y
mysql -u root -p
CREATE DATABASE wordpress DEFAULT CHARACTER SET utf8 COLLATE utf8_unicode_ci;
GRANT ALL ON wordpress.* TO 'wordpressuser'@'localhost' IDENTIFIED BY 'password';
FLUSH PRIVILEGES;
EXIT;
3: Install PHP 7.0 and Related Modules
sudo apt-get install software-properties-common
sudo add-apt-repository ppa:ondrej/php
sudo apt update
Then run the below.
sudo apt install php7.0 libapache2-mod-php7.0 php7.0-common php7.0-mbstring php7.0-xmlrpc php7.0-gd php7.0-xml php7.0-mysql php7.0-cli php7.0-zip php7.0-curlThereafter open the PHP.ini and make the below changes
sudo nano /etc/php/7.0/apache2/php.ini
memory_limit = 256M
upload_max_filesize = 100M
max_execution_time = 360
date.timezone = America/Chicago
4: Download WordPress Latest Release
After downloading, run the commands below to extract the downloaded file and move it into a new WordPress root directory.
cd /tmp && wget https://wordpress.org/latest.tar.gz
tar -zxvf latest.tar.gz
sudo mv wordpress/* /var/www/html/
For WordPress to function correctly, run the commands below to set the correct permissions.
sudo chown -R www-data:www-data /var/www/html/
sudo chmod -R 755 /var/www/html/
5: Configure Apache2 HTTP Server
Now configure the Apache site configuration file for WordPress. This file will control how users access WordPress. Run the commands below to create a new configuration file called wordpress.conf
sudo nano /etc/apache2/sites-available/wordpress.conf
Then copy and paste the content below into the file and save it. Replace the highlighted line with your own domain name and directory root location.
<VirtualHost *:80>
     ServerAdmin admin@example.com
     DocumentRoot /var/www/html/
     ServerName example.com
     ServerAlias www.example.com

     <Directory /var/www/html/>
        Options +FollowSymlinks
        AllowOverride All
        Require all granted
     </Directory>

     ErrorLog ${APACHE_LOG_DIR}/error.log
     CustomLog ${APACHE_LOG_DIR}/access.log combined

</VirtualHost>
Save file and exit. CTRL+x
Now enable the WordPress and Rewrite Module and restart Apache
sudo a2ensite wordpress.conf
sudo a2enmod rewrite
sudo systemctl restart apache2.service
6: CONFIGURE WORDPRESS
Run the commands below to create WordPress wp-config.php file.
sudo mv /var/www/html/wp-config-sample.php /var/www/html/wp-config.php
sudo nano /var/www/html/wp-config.php
Enter the highlighted text below that you created for your database and save. If you changed database and user then amend them here before saving.
// ** MySQL settings - You can get this info from your web host ** //
/** The name of the database for WordPress */
define('DB_NAME', 'wordpress');

/** MySQL database username */
define('DB_USER', 'wordpressuser');

/** MySQL database password */
define('DB_PASSWORD', 'password');

/** MySQL hostname */
define('DB_HOST', 'localhost');

/** Database Charset to use in creating database tables. */
define('DB_CHARSET', 'utf8');

/** The Database Collate type. Don't change this if in doubt. */
define('DB_COLLATE', '');
Then
sudo rm /var/www/html/index.htmlsudo service apache2 restart
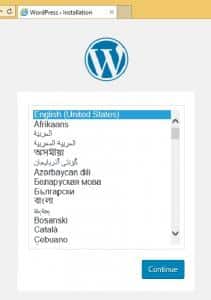
Now open your browser and browse to your domain name to launch the WordPress configuration wizard.
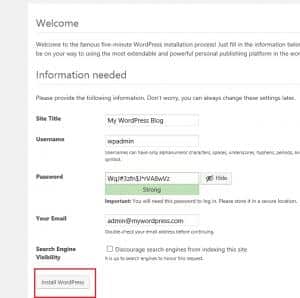
Then type the WordPress website name and create a new admin user and password.. the click install.
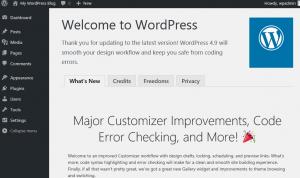
This should install WordPress.
Optional – Now lets look at enabling SSL for the site.
Step 1 — Install the Let’s Encrypt Client for your Website
First, add the repository:
sudo add-apt-repository ppa:certbot/certbot
Then install Certbot
sudo apt-get update
sudo apt-get install python-certbot-apache
Step 2 — Set Up the SSL Certificate
sudo certbot --apache -d example.com
sudo certbot --apache -d example.com -d www.example.com

You can also search youtube for some great video tutorials.